
Farmer carry weight loss works because you’re moving under load: legs drive, core braces, grip fights, and your heart rate climbs fast. Plus, you’ll build “real-life” strength without living on a treadmill. Below, I’ll show you exactly how I run a beginner-friendly 4-week plan (sets, distances, rest), along with technique cues that keep your low back happy.
I first added carries when my workouts had to shrink to 30 minutes (busy season at work, zero patience for complicated programming). Surprisingly, my conditioning improved even though I did less total stuff. However, the secret wasn’t suffering more—it was staying tight, walking clean, and progressing slowly instead of grabbing the heaviest dumbbells and wobbling around like a shopping cart with one bad wheel.
If you’re pairing carries with fat loss, protein matters. I’m not precious about brands, but a basic whey protein powder makes hitting your daily target easier—especially on days you’re rushing. Also, strength training plus higher protein intake tends to support lean mass during weight loss, which is the whole point of “losing weight” without feeling weak.
One quick reality check: carries don’t magically melt fat on their own. Even so, they’re great at stacking “quiet wins”—more daily calorie burn, better posture, stronger trunk, and improved work capacity. Over time, those things make it easier to train consistently, which is the part most people skip.
What makes farmer carry weight loss-friendly (and not just a grip exercise)?
Farmer’s carries are a full-body loaded walk. Essentially, you’re doing a moving plank while your legs keep stepping—so the effort is high, but the skill demand is low. As a result, it’s easier to repeat week after week, and that consistency matters more than any “perfect” exercise selection.
- More muscle involved: traps, lats, forearms, abs, glutes, and quads all contribute.
- Higher heart rate quickly: the load pushes your breathing up without needing sprints.
- Time-efficient conditioning: short bouts add up fast.
- Posture and bracing practice: you learn to stay stacked (ribs over hips) while moving.
Interestingly, this is the same reason loaded carries show up in a lot of strength and conditioning programs: they build general capacity without frying you like high-impact intervals can. For broader physical activity recommendations tied to health and weight management, see the CDC adult activity guidelines. And, you can review evidence-based protein guidance from the International Society of Sports Nutrition (ISSN).


How many calories do farmer’s carries burn?
You’ll see a lot of dramatic claims online, and honestly, most of them are guessy. Instead, think in ranges. Calorie burn depends on body weight, load, speed, and how long you’re actually walking.
For a practical benchmark, strength-style conditioning often lands in a moderate-to-vigorous range. For example, Harvard’s health chart lists vigorous weight training at about 266–533 calories per 30 minutes depending on body weight (Harvard Health). Carries aren’t exactly “weight training” in the classic sense, but the intensity can be similar when you’re moving under load with limited rest.
Also, daily movement still matters. Notably, a widely cited estimate is that 10,000 steps often totals around ~5 miles for many adults (Mayo Clinic). In other words, these walks won’t replace your steps; rather, they make your “conditioning minutes” count more.
Importantly, stronger body composition habits help the plan stick. According to a 2024 survey by the International Food Information Council (IFIC), 63% of Americans said they tried to limit or avoid sugars in the past year. Meanwhile, research from ACSM notes that adults should aim for 150 minutes of moderate-intensity activity weekly, and meeting that target correlates with better weight-management outcomes.
Finally, protein can make dieting feel less miserable. According to a 2024 review discussed by the BMJ, higher-protein diets can improve satiety outcomes, with several trials reporting ~10–15% lower daily energy intake versus lower-protein comparators.
A simple 4-week farmer’s carry plan for beginners
This progression is set up for 2 sessions per week. You can add it after your main strength lifts or run it as a short standalone workout. Either way, keep the first week almost comically easy. Therefore, you’ll actually progress instead of stalling from soreness or cranky elbows.
How to choose the starting weight: Pick a load you could carry for 45–60 seconds if you absolutely had to. For this plan, you’ll stop earlier than that. You should finish each set thinking, “I could’ve done a bit more,” not “I almost died.”
Week 1 (skill + bracing)
- Sets: 6
- Distance per set: 15–20 meters (or ~30–45 seconds if you’re indoors)
- Rest: 60–90 seconds
- Goal: smooth steps, tall posture, no side-to-side wobble
Week 2 (more total work)
- Sets: 7
- Distance per set: 20–25 meters
- Rest: 60–90 seconds
- Goal: same posture, slightly longer walks
Week 3 (heavier, slightly shorter)
- Sets: 8
- Distance per set: 15–20 meters
- Rest: 75–120 seconds
- Goal: increase weight 5–10% if Week 2 was clean
Week 4 (density week)
- Sets: 10
- Distance per set: 15–20 meters
- Rest: 45–75 seconds
- Goal: keep weight the same as Week 3, reduce rest
Progress rule (super simple): Only add weight if you can keep your ribs down, shoulders level, and steps controlled. Otherwise, add distance or reduce rest first. Besides, sloppy carries turn into low-back irritation fast, and that’s the opposite of what you want.
Technique cues that protect your low back (the stuff people skip)
I’ve watched a lot of beginners turn carries into a weird shrug-and-lean situation. Sure, it looks “hard,” but it isn’t productive. Instead, aim for clean and boring. Honestly, boring is good.
- Set your ribs over hips: Exhale a bit, feel your abs turn on, then inhale into your sides.
- “Crush the handles”: A stronger grip often improves your whole-body tension.
- Shoulders down and back (but not pinned): Think “tall collarbones,” not an aggressive shrug.
- Walk like you’re balancing a book on your head: Quiet feet, steady head.
- Shorten the set before you break: End the set when posture degrades, not after.
If your low back feels lit up, it’s usually one of three things: (1) you went too heavy, (2) you’re arching and flaring ribs, or (3) your steps are too long and you’re “reaching” forward. Meanwhile, if your forearms are the only thing failing, that’s normal at first—your grip will catch up quickly.
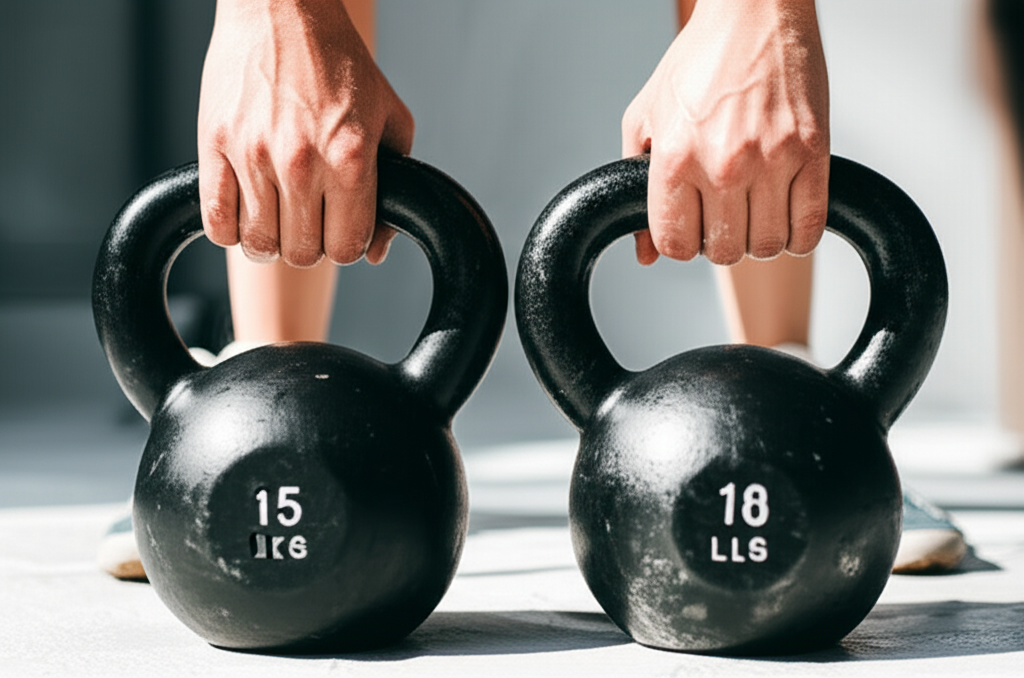
What weight should you use for farmer’s carries?
For most beginners, I like starting around 15–25% of bodyweight in each hand if you’ve got dumbbells or kettlebells that fit. However, if that instantly wrecks your posture, go lighter. If it feels like a casual grocery walk, go heavier.
Here’s my personal “sniff test”: you should be able to nasal-breathe for the first half of each carry. If you’re gasping after five steps, it’s too heavy for a beginner fat-loss plan. Save that hero stuff for later—you won’t need it yet.
Substitutions: dumbbells, kettlebells, and household items
No fancy gym setup? You’re fine. In fact, I’ve done these in hotel hallways with whatever I could safely grip. Just keep the loads even and the path clear.
- Dumbbells: easiest option; choose ones with a comfortable handle.
- Kettlebells: great for grip; keep the bell from swinging by staying tight.
- Trap bar carry: extremely back-friendly for many people (if your gym has one).
- Two loaded backpacks: zip them fully and hold by the top handles.
- Two water jugs: simple, but watch for sloshing—go slower.
- Buckets with sand or books: surprisingly good; wrap the handle if it digs into your hands.
One more practical tip: measure distance with “laps.” For example, walk to the end of your driveway and back. Or do hallway laps for 30–45 seconds. Ultimately, consistency beats precision here.
How to plug carries into a weekly fat-loss routine (without overthinking it)
If you’re already lifting 3 days a week, add carries after two sessions. Keep them crisp and leave the gym feeling like you could’ve done one more set. Because of this, you’ll recover better and still have energy to hit your steps and meals.
- Option A (after strength): Squats/hinges + presses/rows, then carries.
- Option B (quick conditioning day): 5-min warm-up, then 20 minutes of carries + easy cardio.
If you want a simple pairing, I like: farmer’s carries + incline walking. First, one is loaded tension. Then, the other is steady breathing. Together, they’re boring in the best way, and you’ll actually stick with it.
Common mistakes (so you don’t waste a month)
I’ve made most of these myself, which is why I’m a little spicy about them:
- Going too heavy in Week 1: Your grip fails, your posture collapses, and you learn nothing.
- Turning it into a shrug contest: Traps working is fine; neck pain isn’t.
- Holding your breath the whole time: Brace, yes. But keep controlled breathing.
- Long sets with ugly form: Stop the set, rest, then do another clean one.
Quick recap (so you can start today)
Farmer carry weight loss training is effective because it blends full-body strength and conditioning in a short window. Start light, keep your ribs stacked over your hips, and progress by adding sets, distance, or reducing rest before chasing heavier weights. Do it twice a week for four weeks, and you’ll feel the difference in your posture, grip, and overall work capacity.